
The other day one of my colleagues was trying to add a hyperlink to our company logo so when someone clicks on the image it will redirect them to our company website. Unfortunately his attempt was unsuccessful so he reached out to me for assistance since he noticed that the logo in my signature was already linked. Normally IT or marketing departments handle this task, but because we’re a tech startup we must wear multiple hats around here and sort these things out ourselves. That being said, after negotiating a delicious lunch in exchange for my services I walked him through the steps. I kid. I kid. I didn’t charge him anything for the help. Okay, moving on…
Although adding an image to a Gmail signature is fairly simple, linking the image to a website appears to be a difficult task for a lot of people. Therefore, I thought it would be a good idea to publish a tutorial that explains how to accomplish this task. Here are the steps to convert your logo into a hyperlink image:
Step 1: Launch Gmail Settings
The first thing you need to do is dive into your Gmail settings. Simply click the Gear icon in the top-right corner of your inbox and then select Settings from the drop-down menu. From within the General tab, scroll down until you see the signature field.
Step 2: Compose Text Portion of Signature
Compose the text portion of your signature in the signature field. Feel free to use the formatting tools to create a custom signature.
Step 3: Copy the Image URL
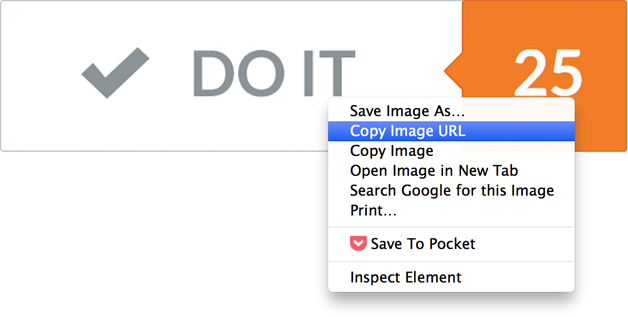
Locate the image on the Web that you would like to include in your Gmail signature and then copy the image URL to your clipboard.
Note: At the time of this writing, Gmail doesn’t support hosted images for signatures, therefore, you must link to an image that is hosted elsewhere on the Web. Don’t panic. You can choose an image hosted on your company’s website (make sure you have permission before hotlinking) or you can upload an image to a photo-sharing site or your cloud storage and then link to it.
Step 4: Insert Image Into Your Gmail Signature
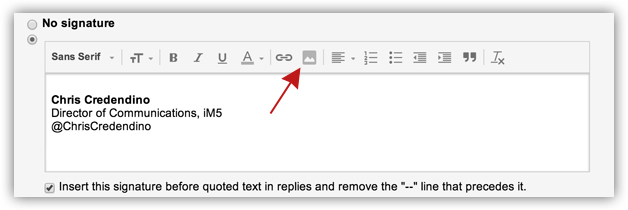
Place your cursor wherever you want your logo displayed in your signature and then click the Insert Image button.
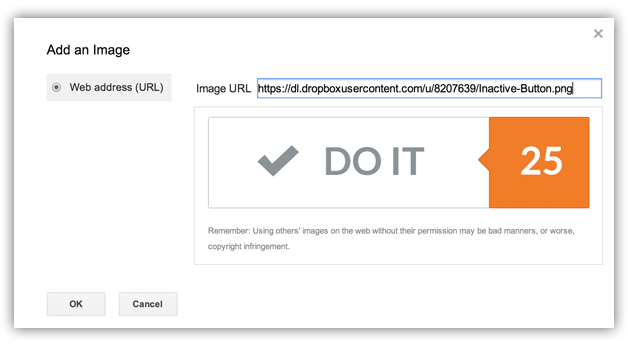
In the Add an Image dialog box, paste the image URL you copied to your clipboard earlier in the Image URL field and then click OK.
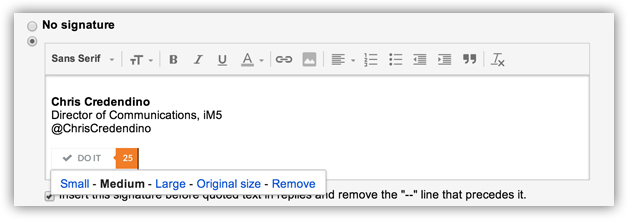
After inserting the image you can either keep the original size of the logo or resize it by choosing Small, Medium, or Large.
Step 5: Link the Image in Your Gmail Signature
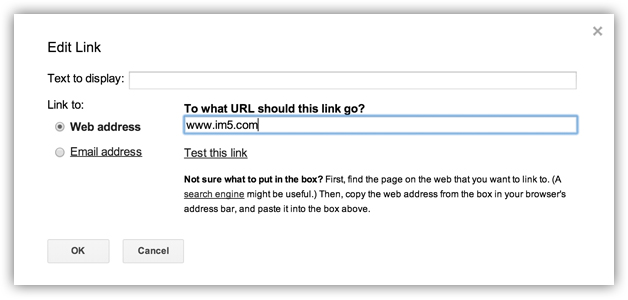
Once you’re satisfied with the quality, size, and placement of your logo you need to make it a functioning hyperlink. Here’s how you do it: Click and drag to highlight your logo until you see a blue shade over the image. Next, click the Link button to launch the hyperlink dialog box.
Now enter the URL you want linked to your logo in the Web address field and then click OK.
Lastly, scroll to the bottom of the settings page and click Save Changes.
Step 6: Test Your New Gmail Signature
If you followed the above steps your logo should now be a functioning hyperlink that redirects anyone who clicks on it to a website. To ensure everything is working correctly, compose an email to see if the logo displays in your signature. If everything looks good, click on the logo to view the website address associated with it. If you would like to perform an additional test, you can send yourself an email and then click on the logo to see if it redirects you.
One Last Thing
I should also point out that you can follow the above steps to include linkable social network images in your Gmail signature such as Twitter, Facebook, LinkedIn, Google+, etc. so people can connect with you.
Enjoy your new and improved Gmail signature.



Comment Section